Repairing a BLACK DECKER Handheld Vacuum
Mar. 31 2021About three years ago, I bought a BLACK+DECKER 20V Max Handheld Vacuum, Cordless, Grey BDH2000PL and it’s been a really nice little vacuum for small pickups. A few months ago, sadly, it would start up fine, but you’d hear the motor spin down after about a minute, and then 20 seconds later it would putter to a stop. The battery was on the outs.
I’ve also recently been bulking up on battery building experience for PEVs (Personal Electric Vehicles) and figured, “how hard could it be to fix this?”
As it turns out – not super hard. Here’s the steps I went through to do so:
Disassembly
Take the vacuum apart. Remove two screws holding the cover on. Lift up lightly and then slide towards the rear to escape some plastic tab detents. Be careful here as if you break these there is no fix, you’ll end up with a loose cover you’ll have to, I suppose, tape back on later.
Slide out the battery pack and disconnect it from the main body. I had to snip the cable connector retainer clips a bit to get mine apart. The plastic pack is held together with some simple snaps, just lever them up to pull the top off.
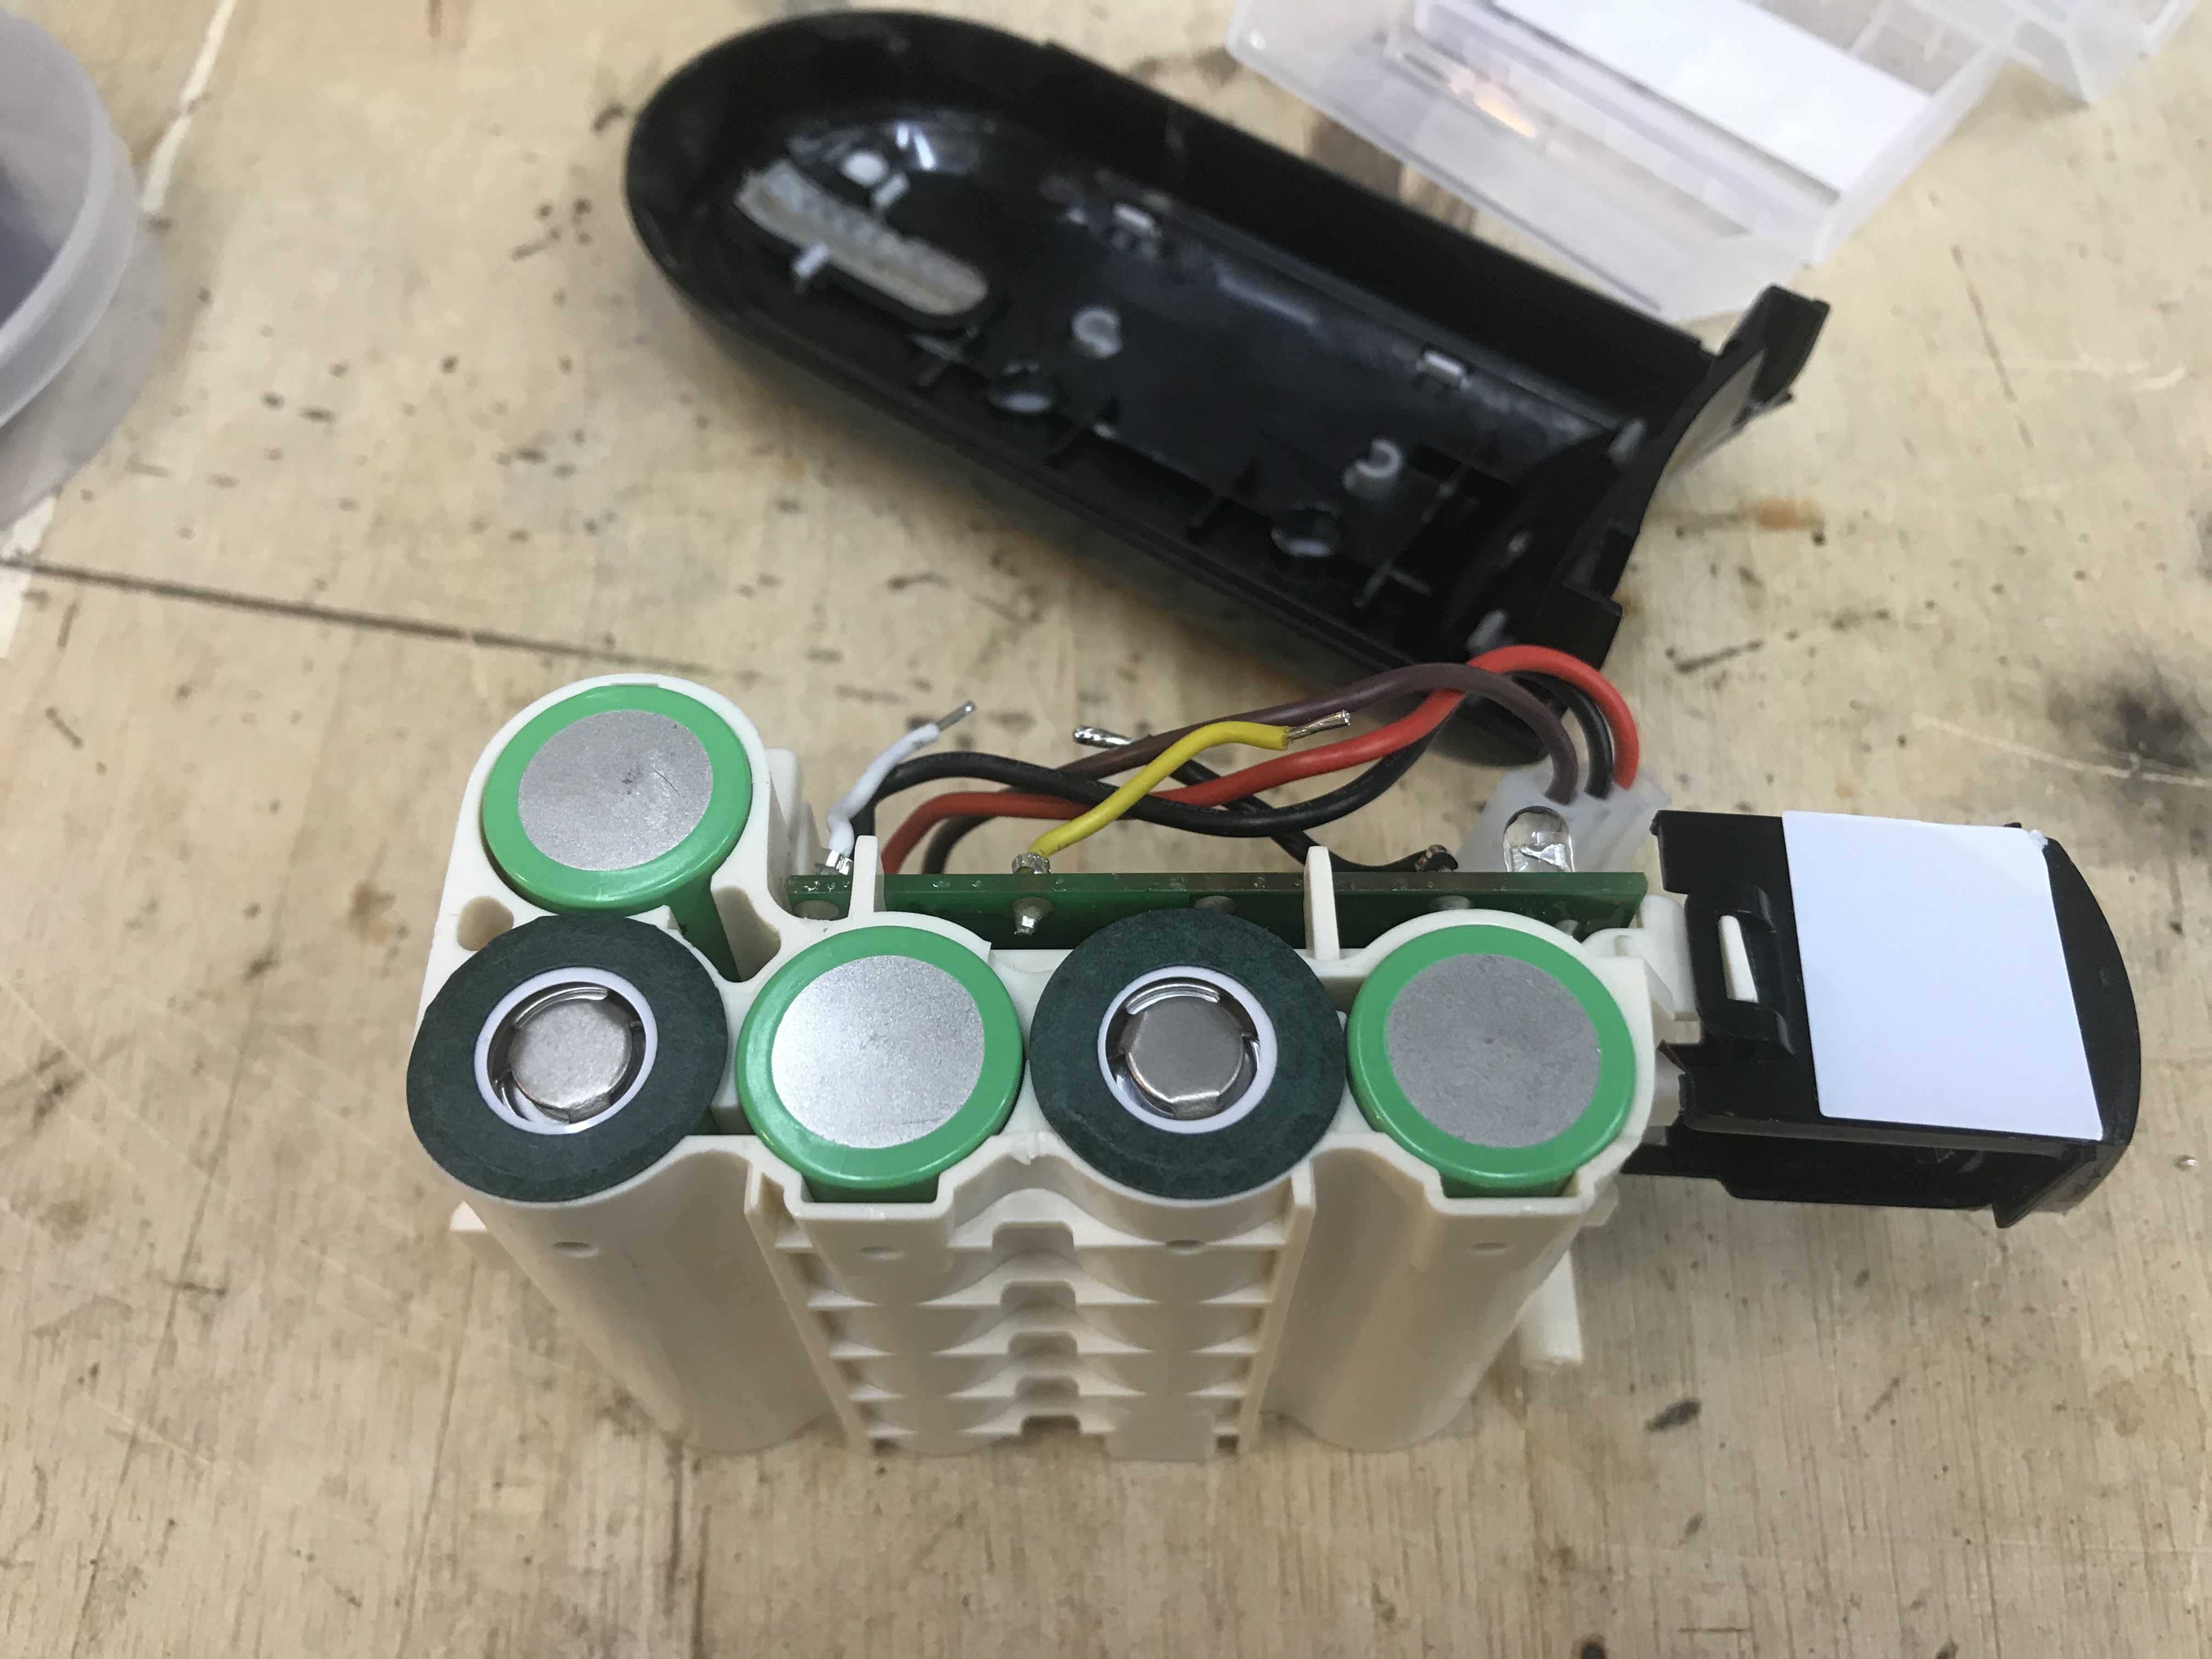
Here’s where you’ll end up, and where most folks give up because, let’s be honest, a soldering iron let along a battery welder, is pretty rare to have:
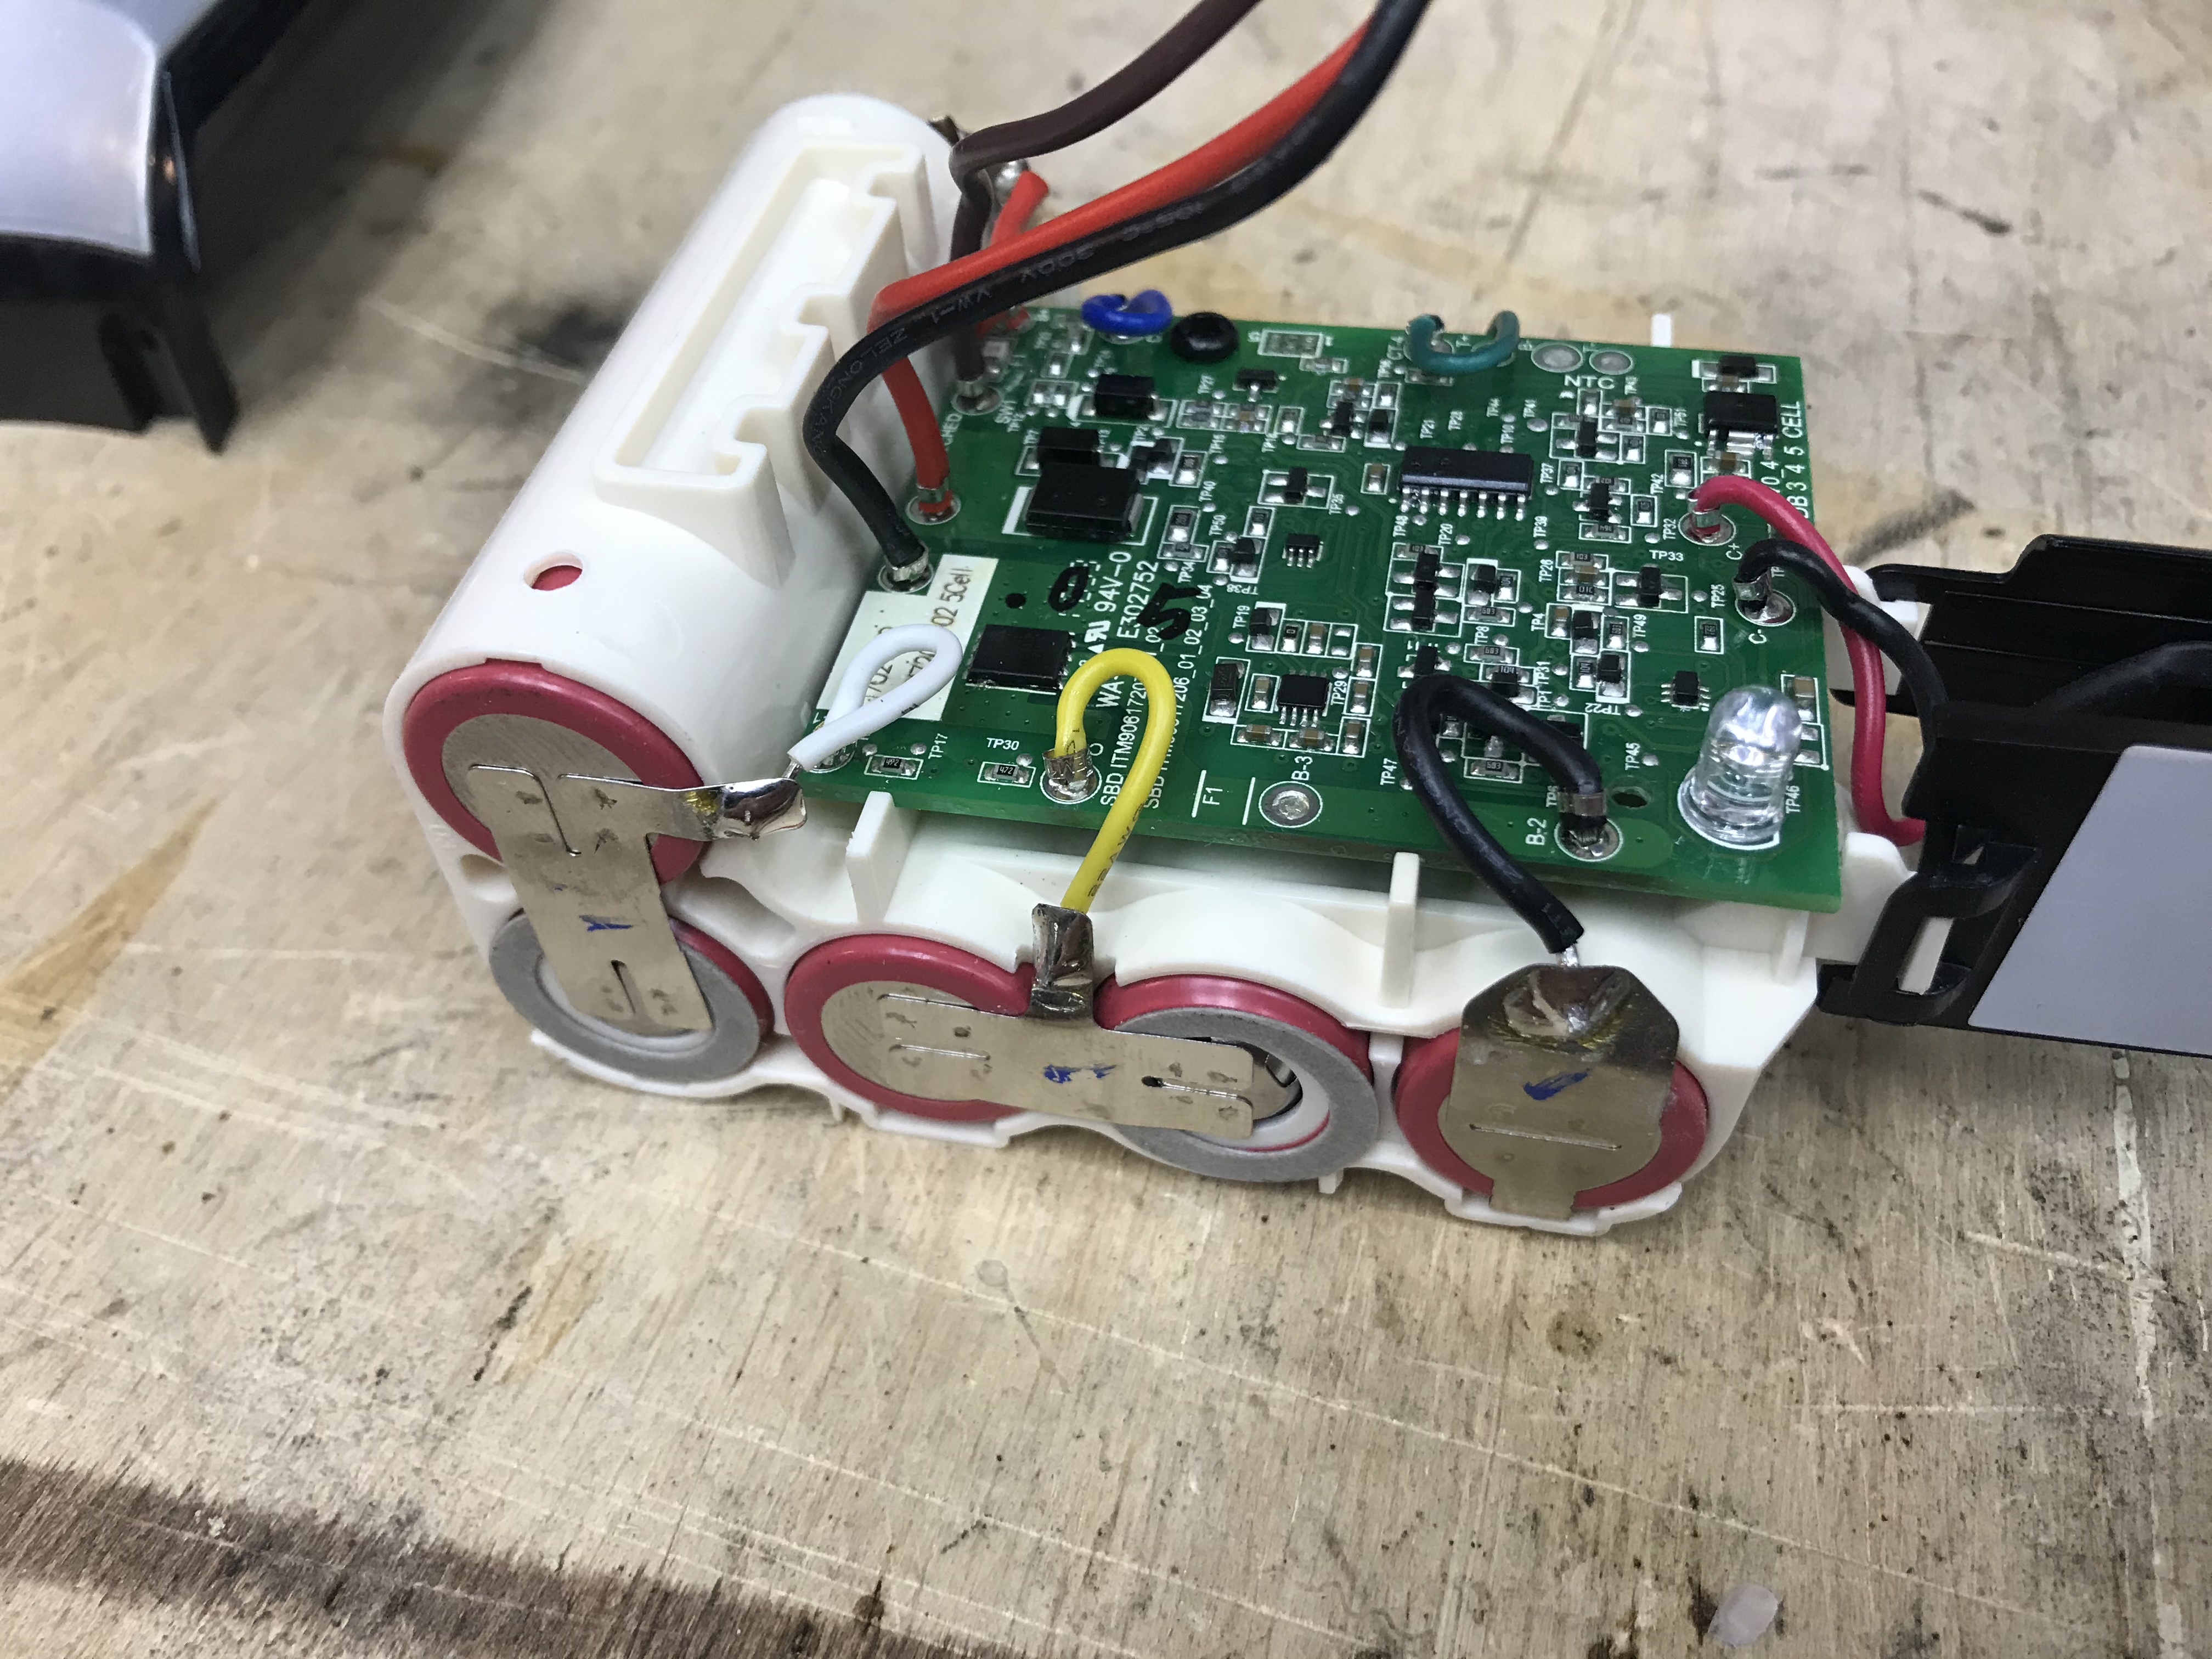
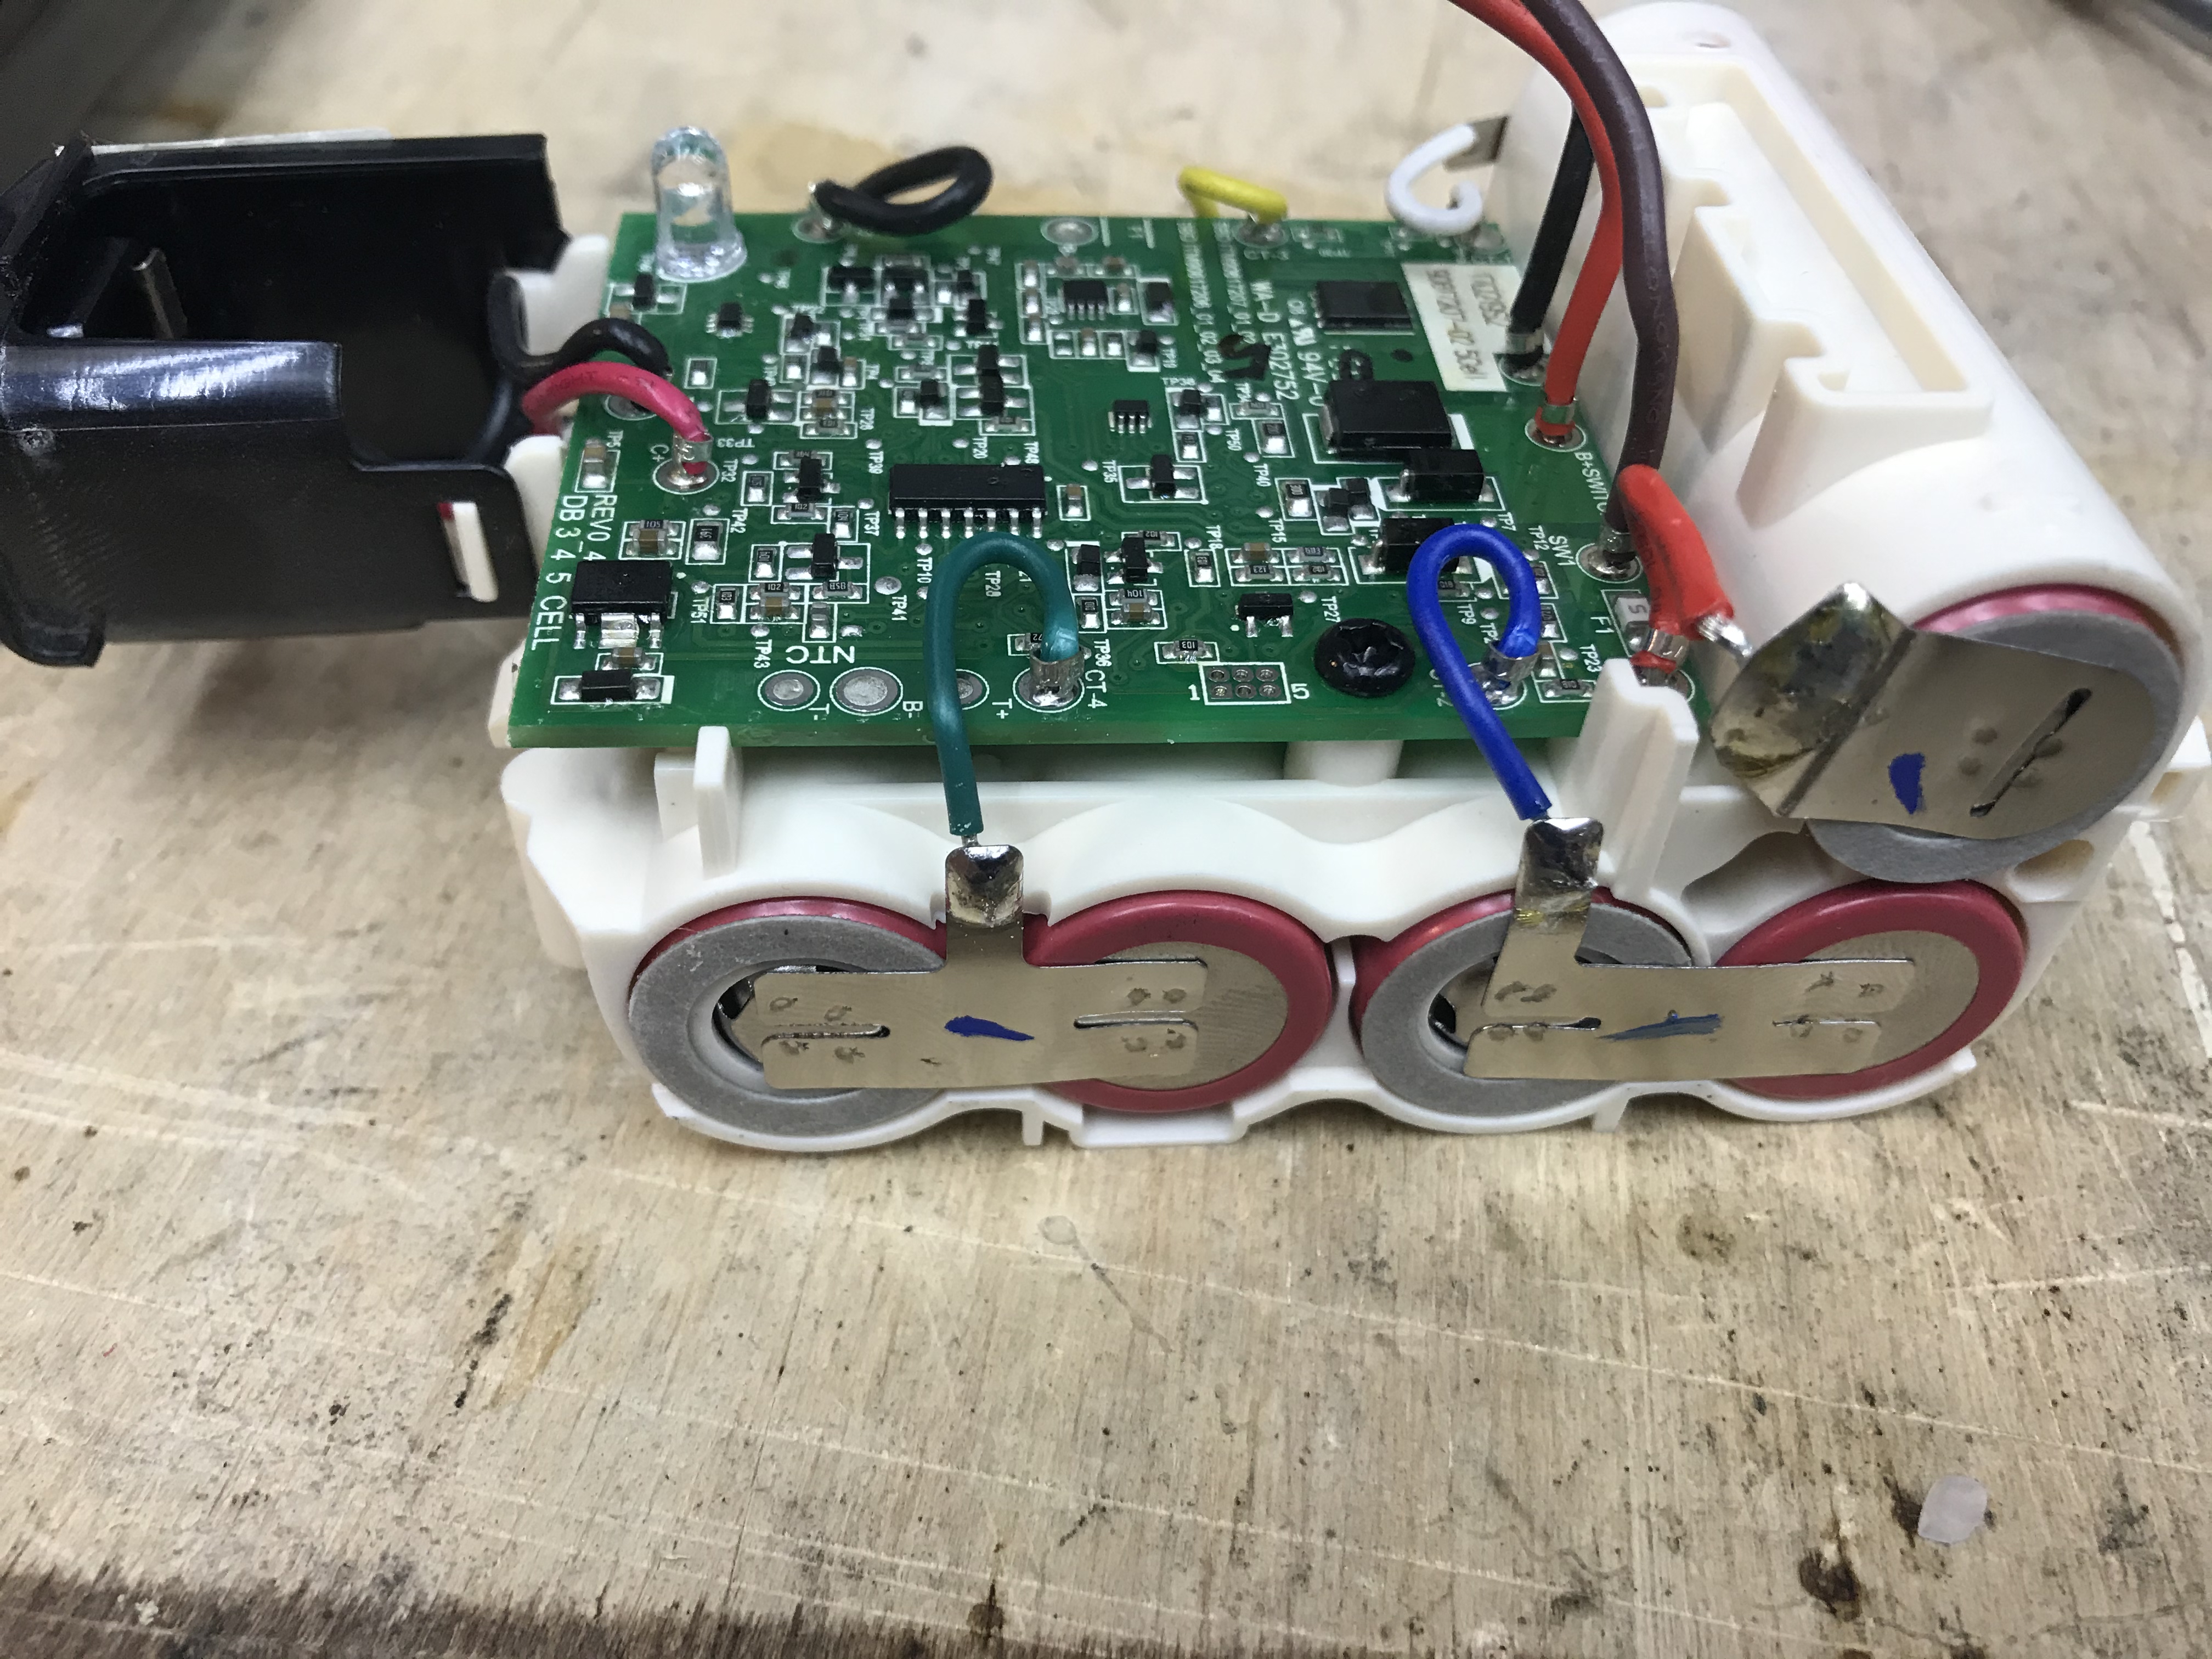
However, if you’ll be carrying on, desolder the wires from the tabs and then rip all the tabs off. You don’t need to worry about being too careful here since the tabs and batteries are all garbage.
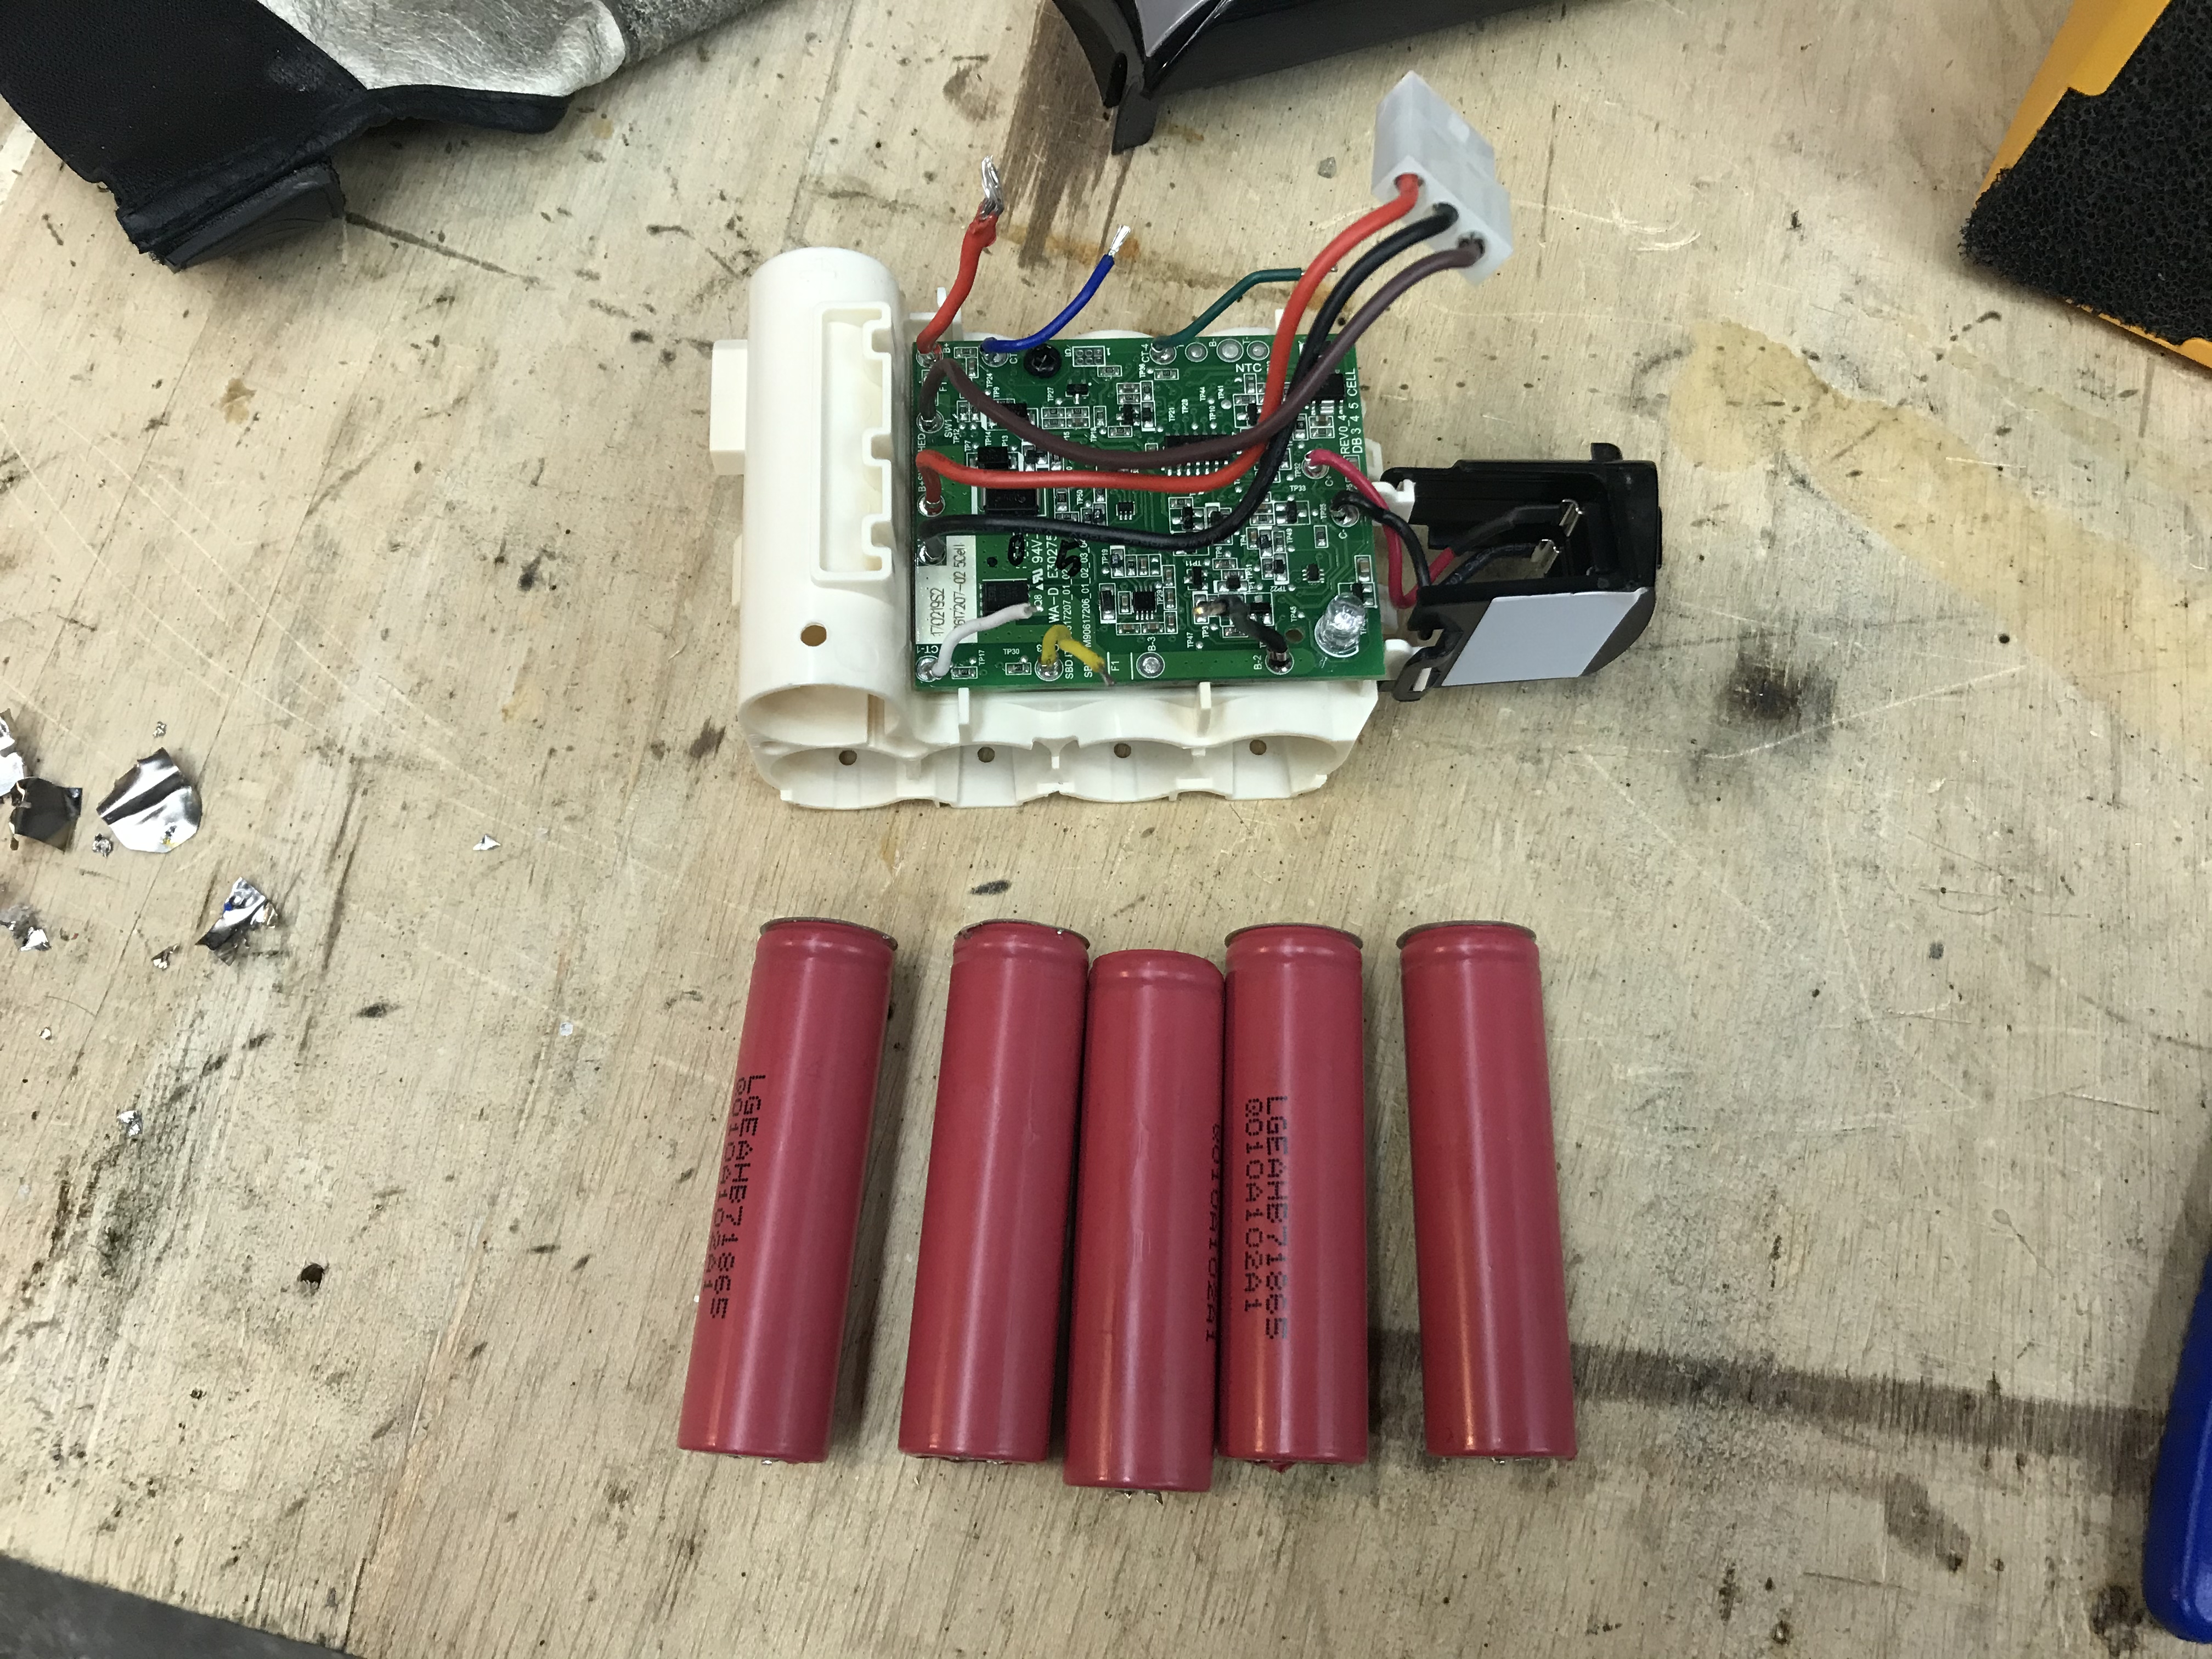
Pull out the old batteries and dispose of them safely.
New Cells and Assembly
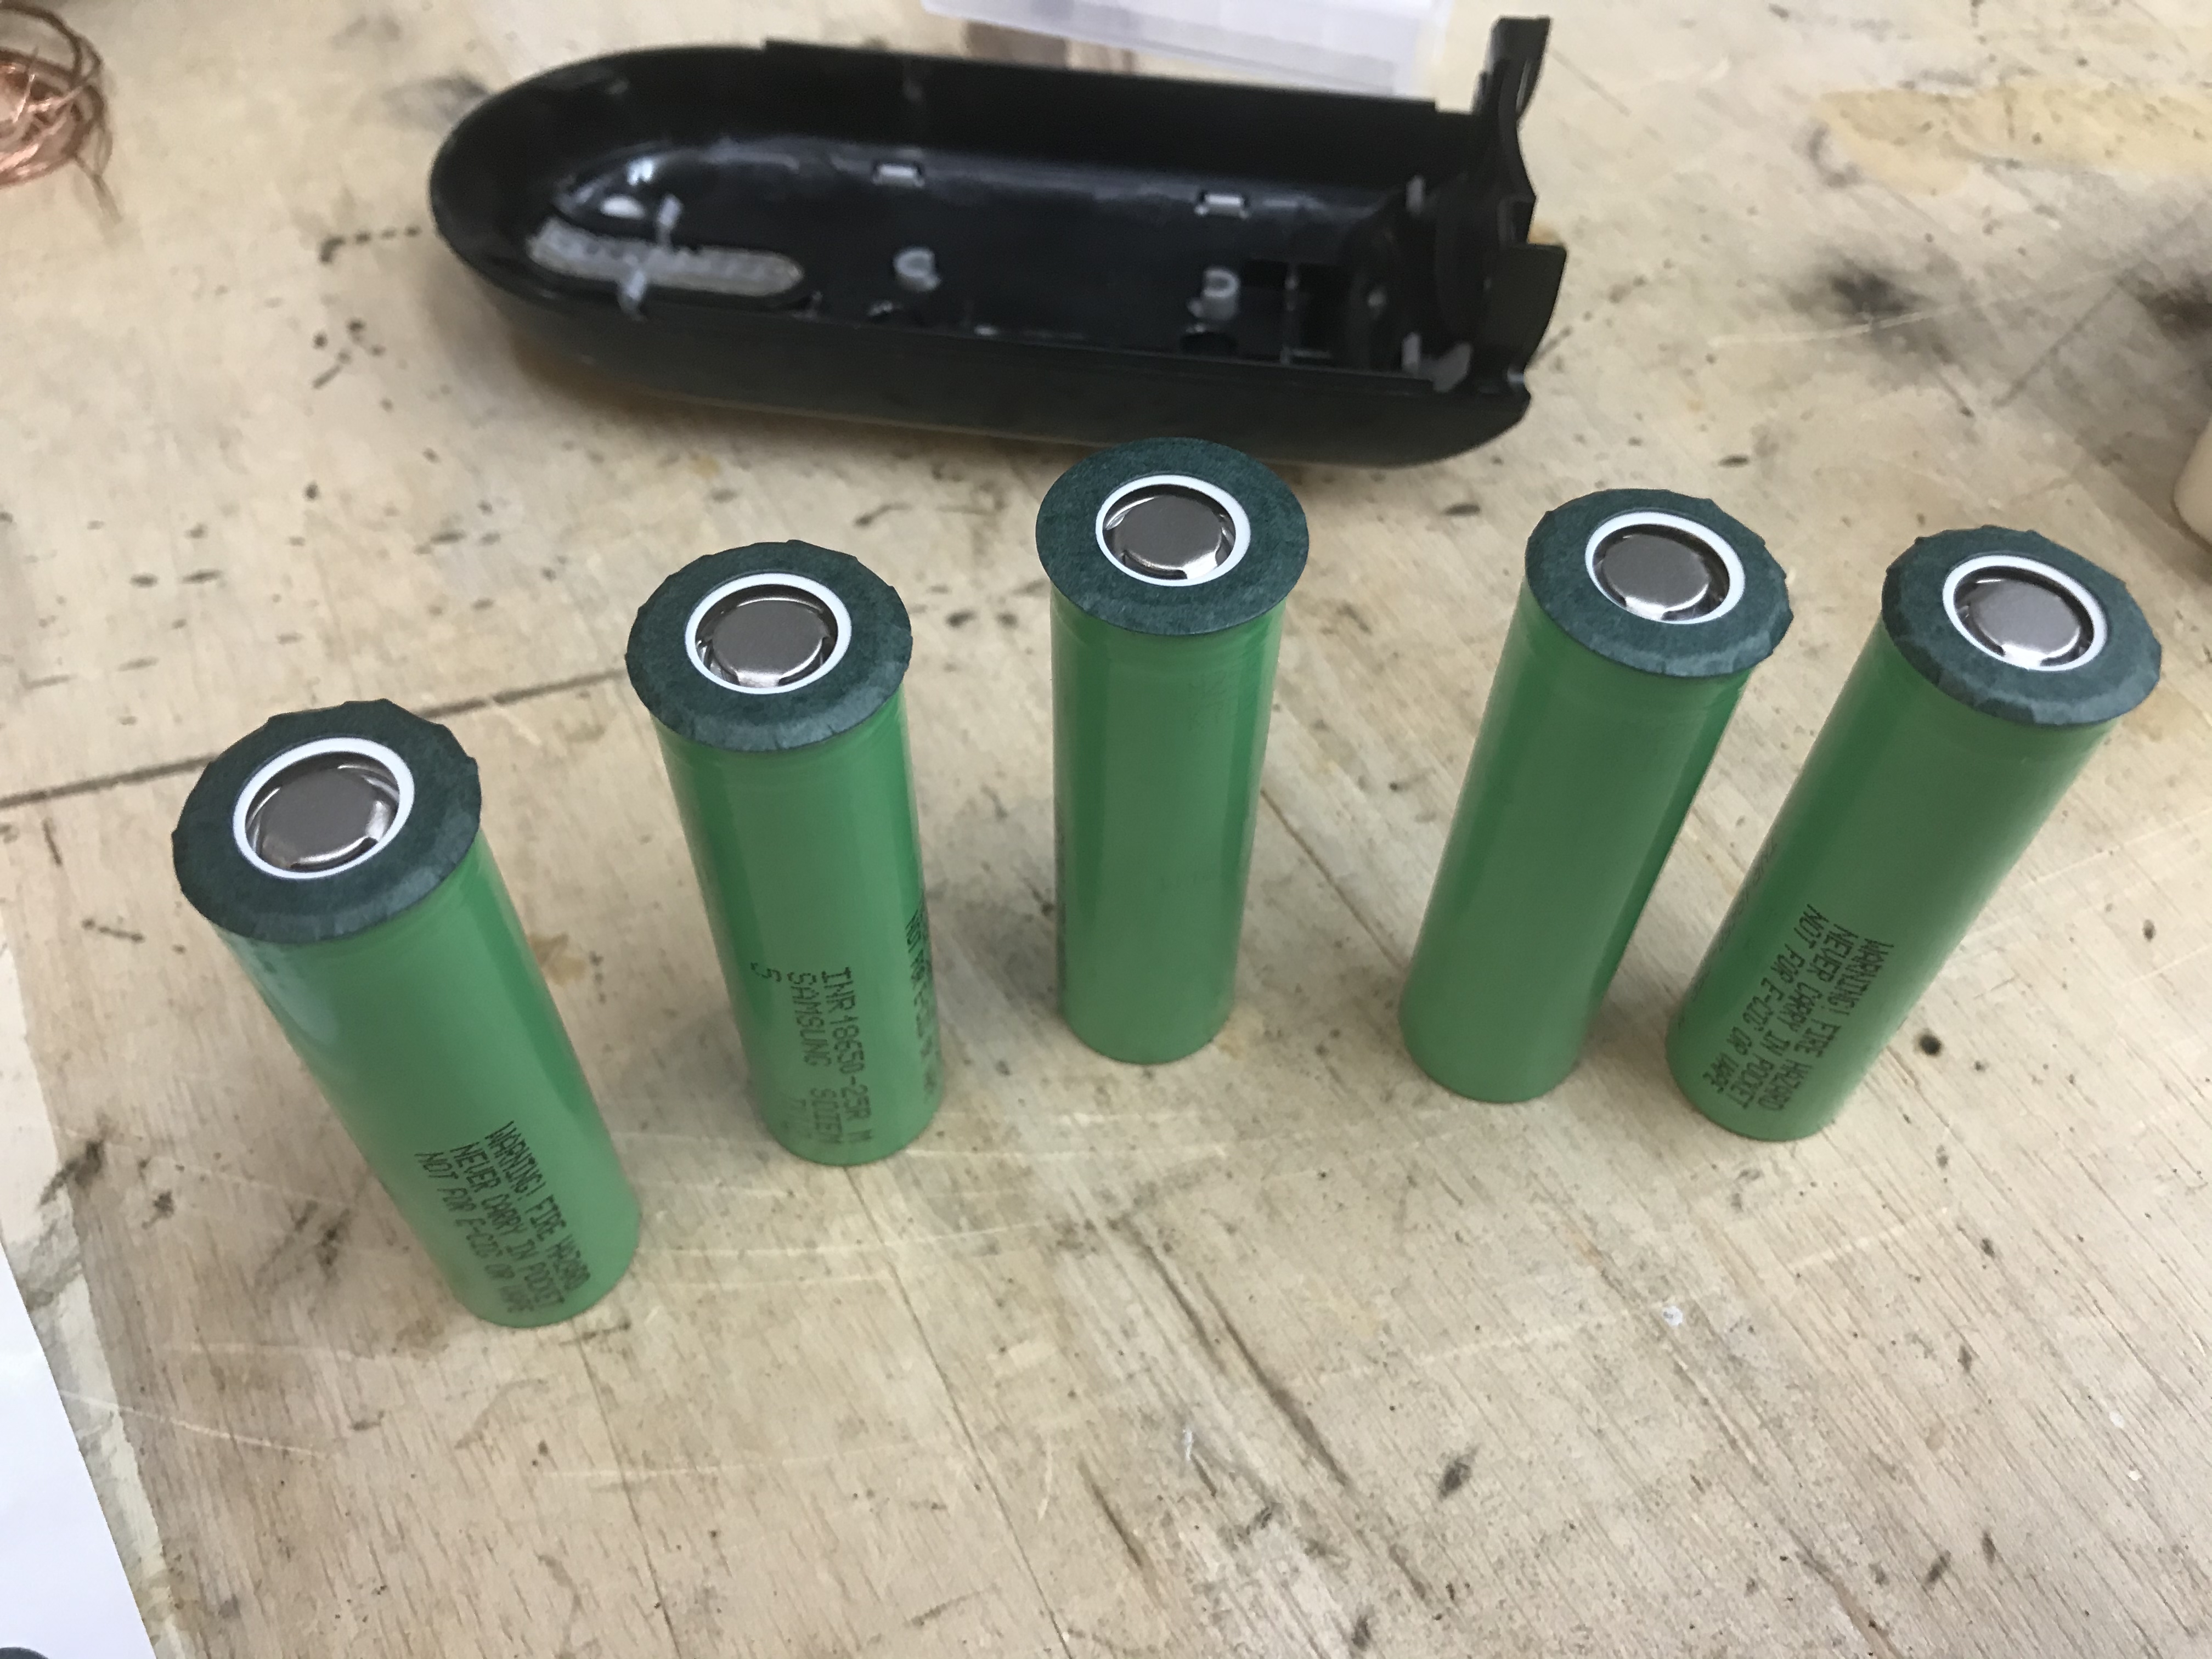
Now, time to get some new cells – the original cells were 1500mAh @ 10A output capability. You only need to meet or exceed the 10A output, and other than that get the highest mAh capacity you can in 18650. Battery stocks were pretty low when I was buying, so I ended up with Samsung 25R (2500mAh @ 20A), but would have preferred Samsung 36G (3600mAh 10A) cells for longer battery life. In either case, though, the replacements last longer than the originals by a pretty decent margin.
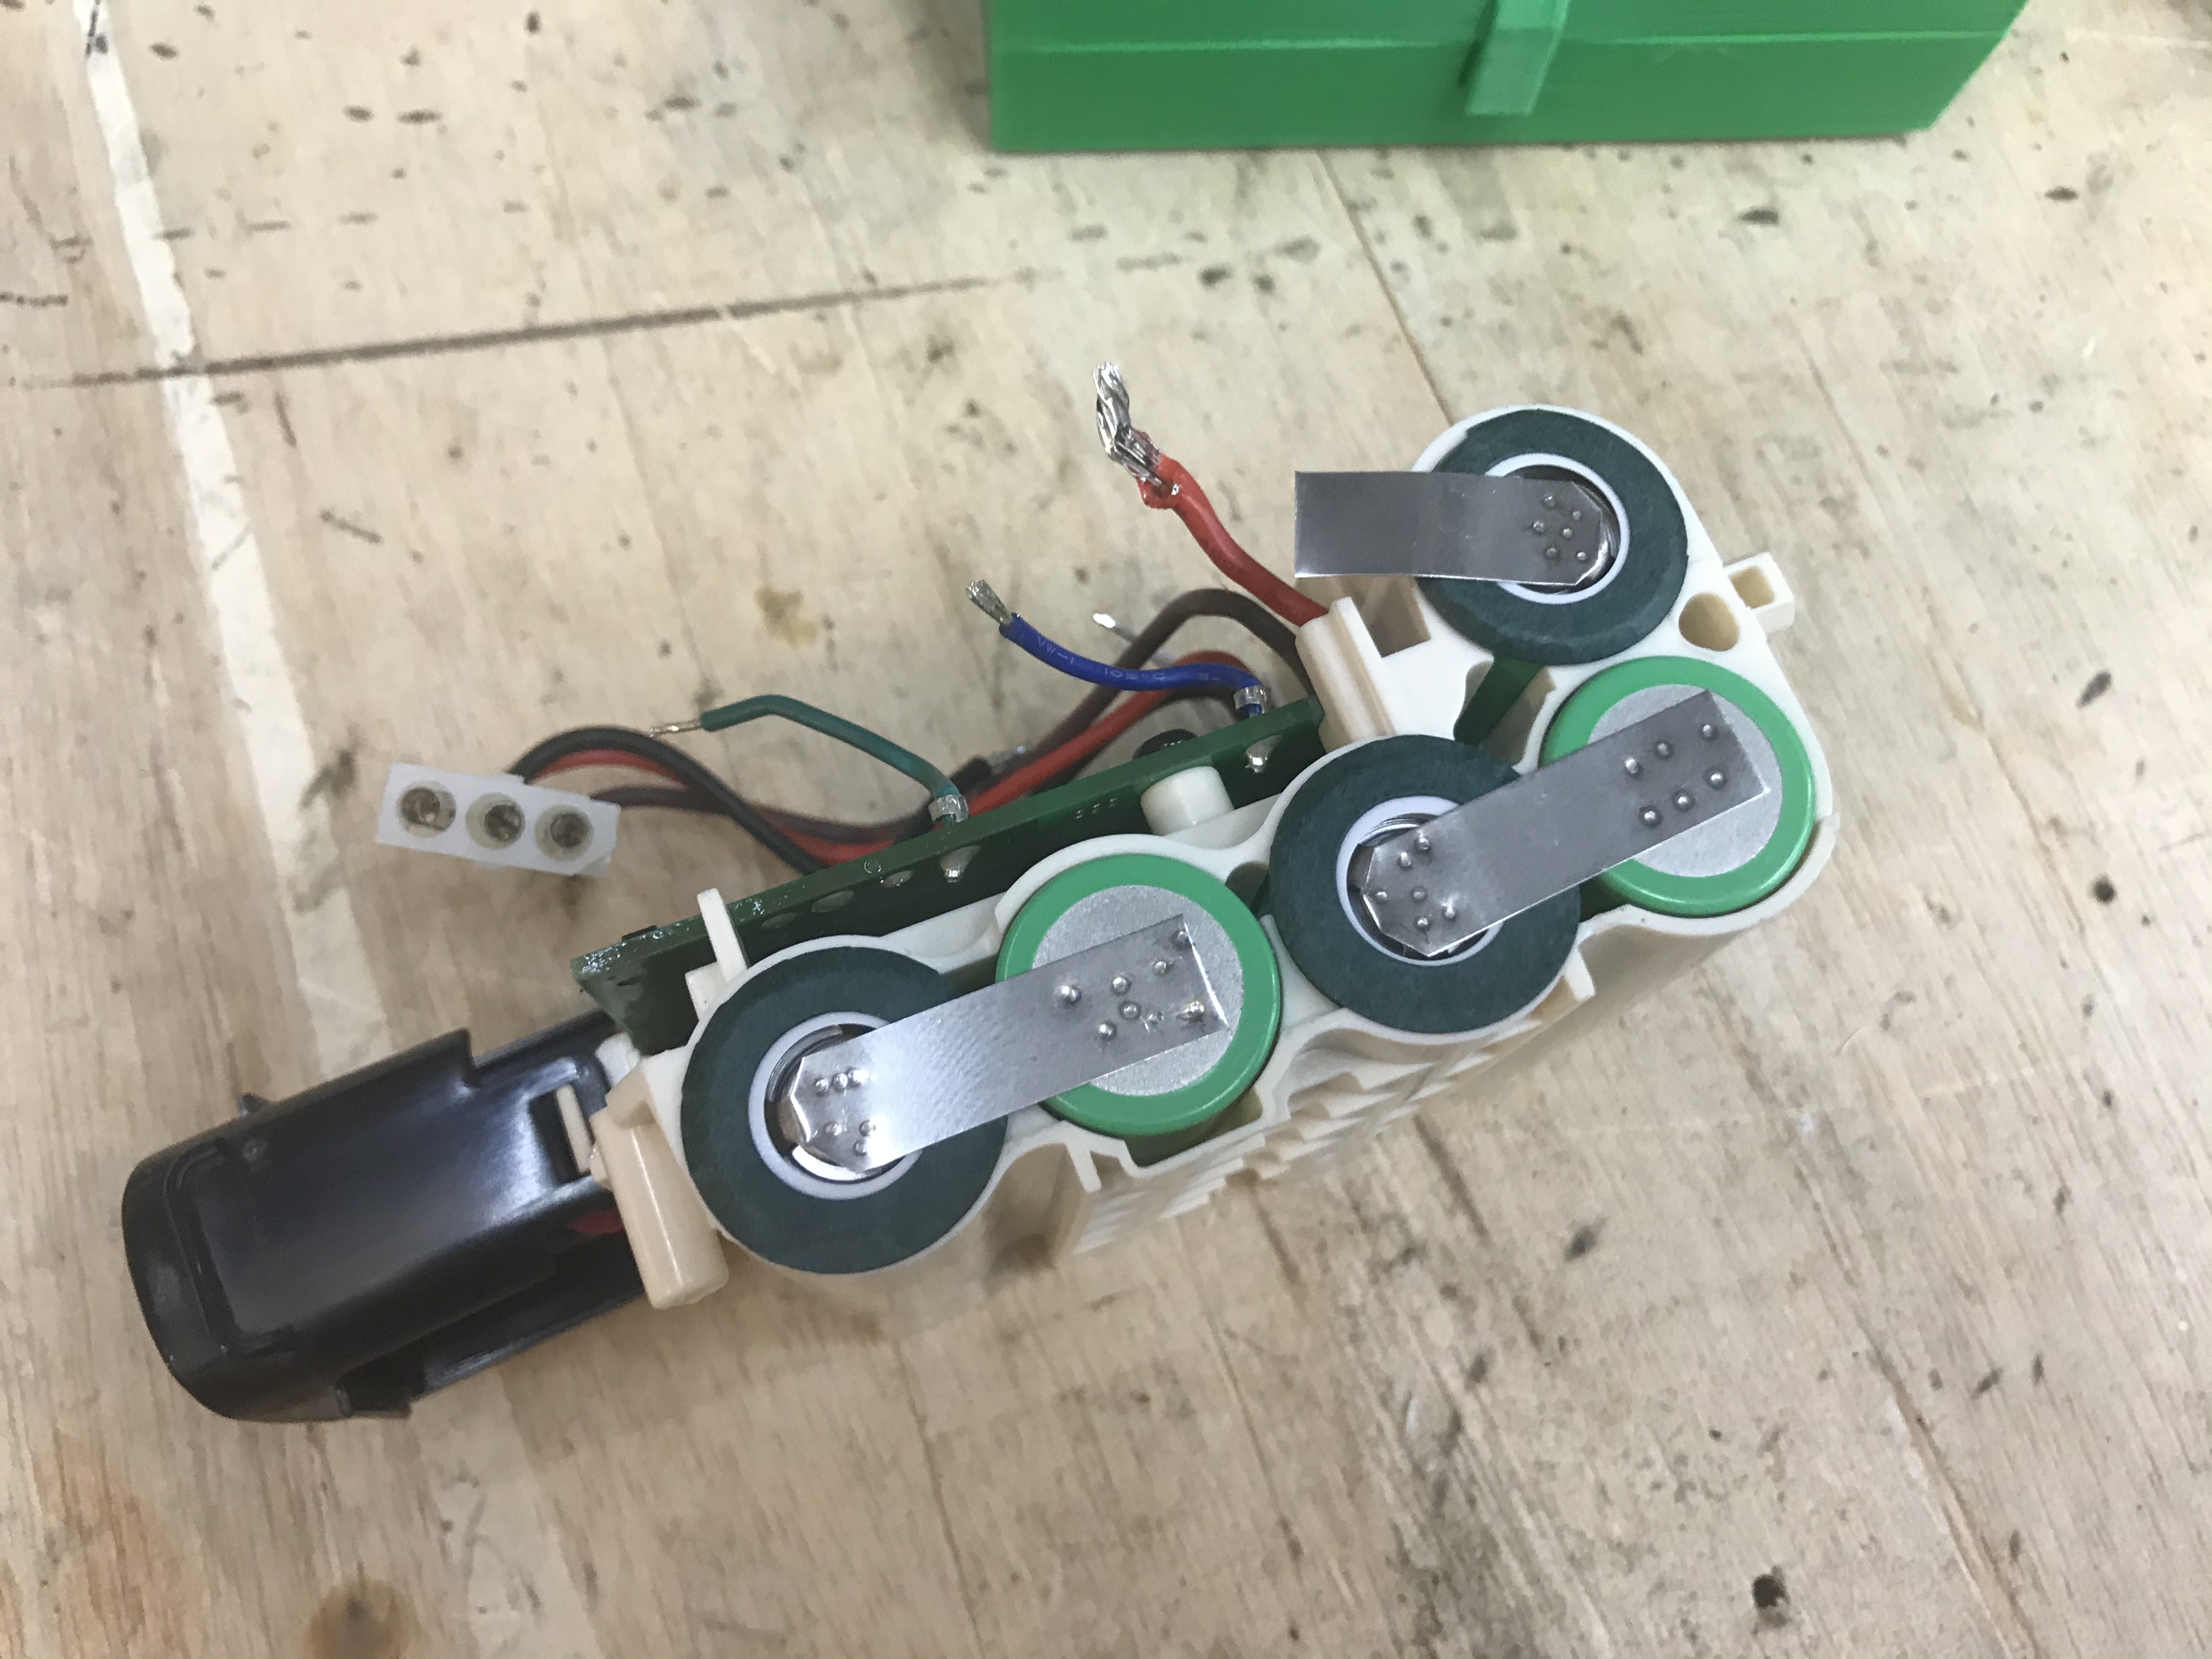
Add some extra cell protection on the postive ends:
Insert them all into the holders in the same directionality as originally shown. I found that it was easier to insert all of them negative first and push it through.
In this next picture, I’ve spot welded some nickle strip between the cells in the same fashion as the battery was originally setup. If you do not have a spot welder, you could attempt to solder wire or nickle strip here, but keep in mind it’s less safe and potentially will shorten the lifespan of your cells to heat them up in that fashion. You also need to worry about getting the lid back on, as it doesn’t have a ton of side clearance.
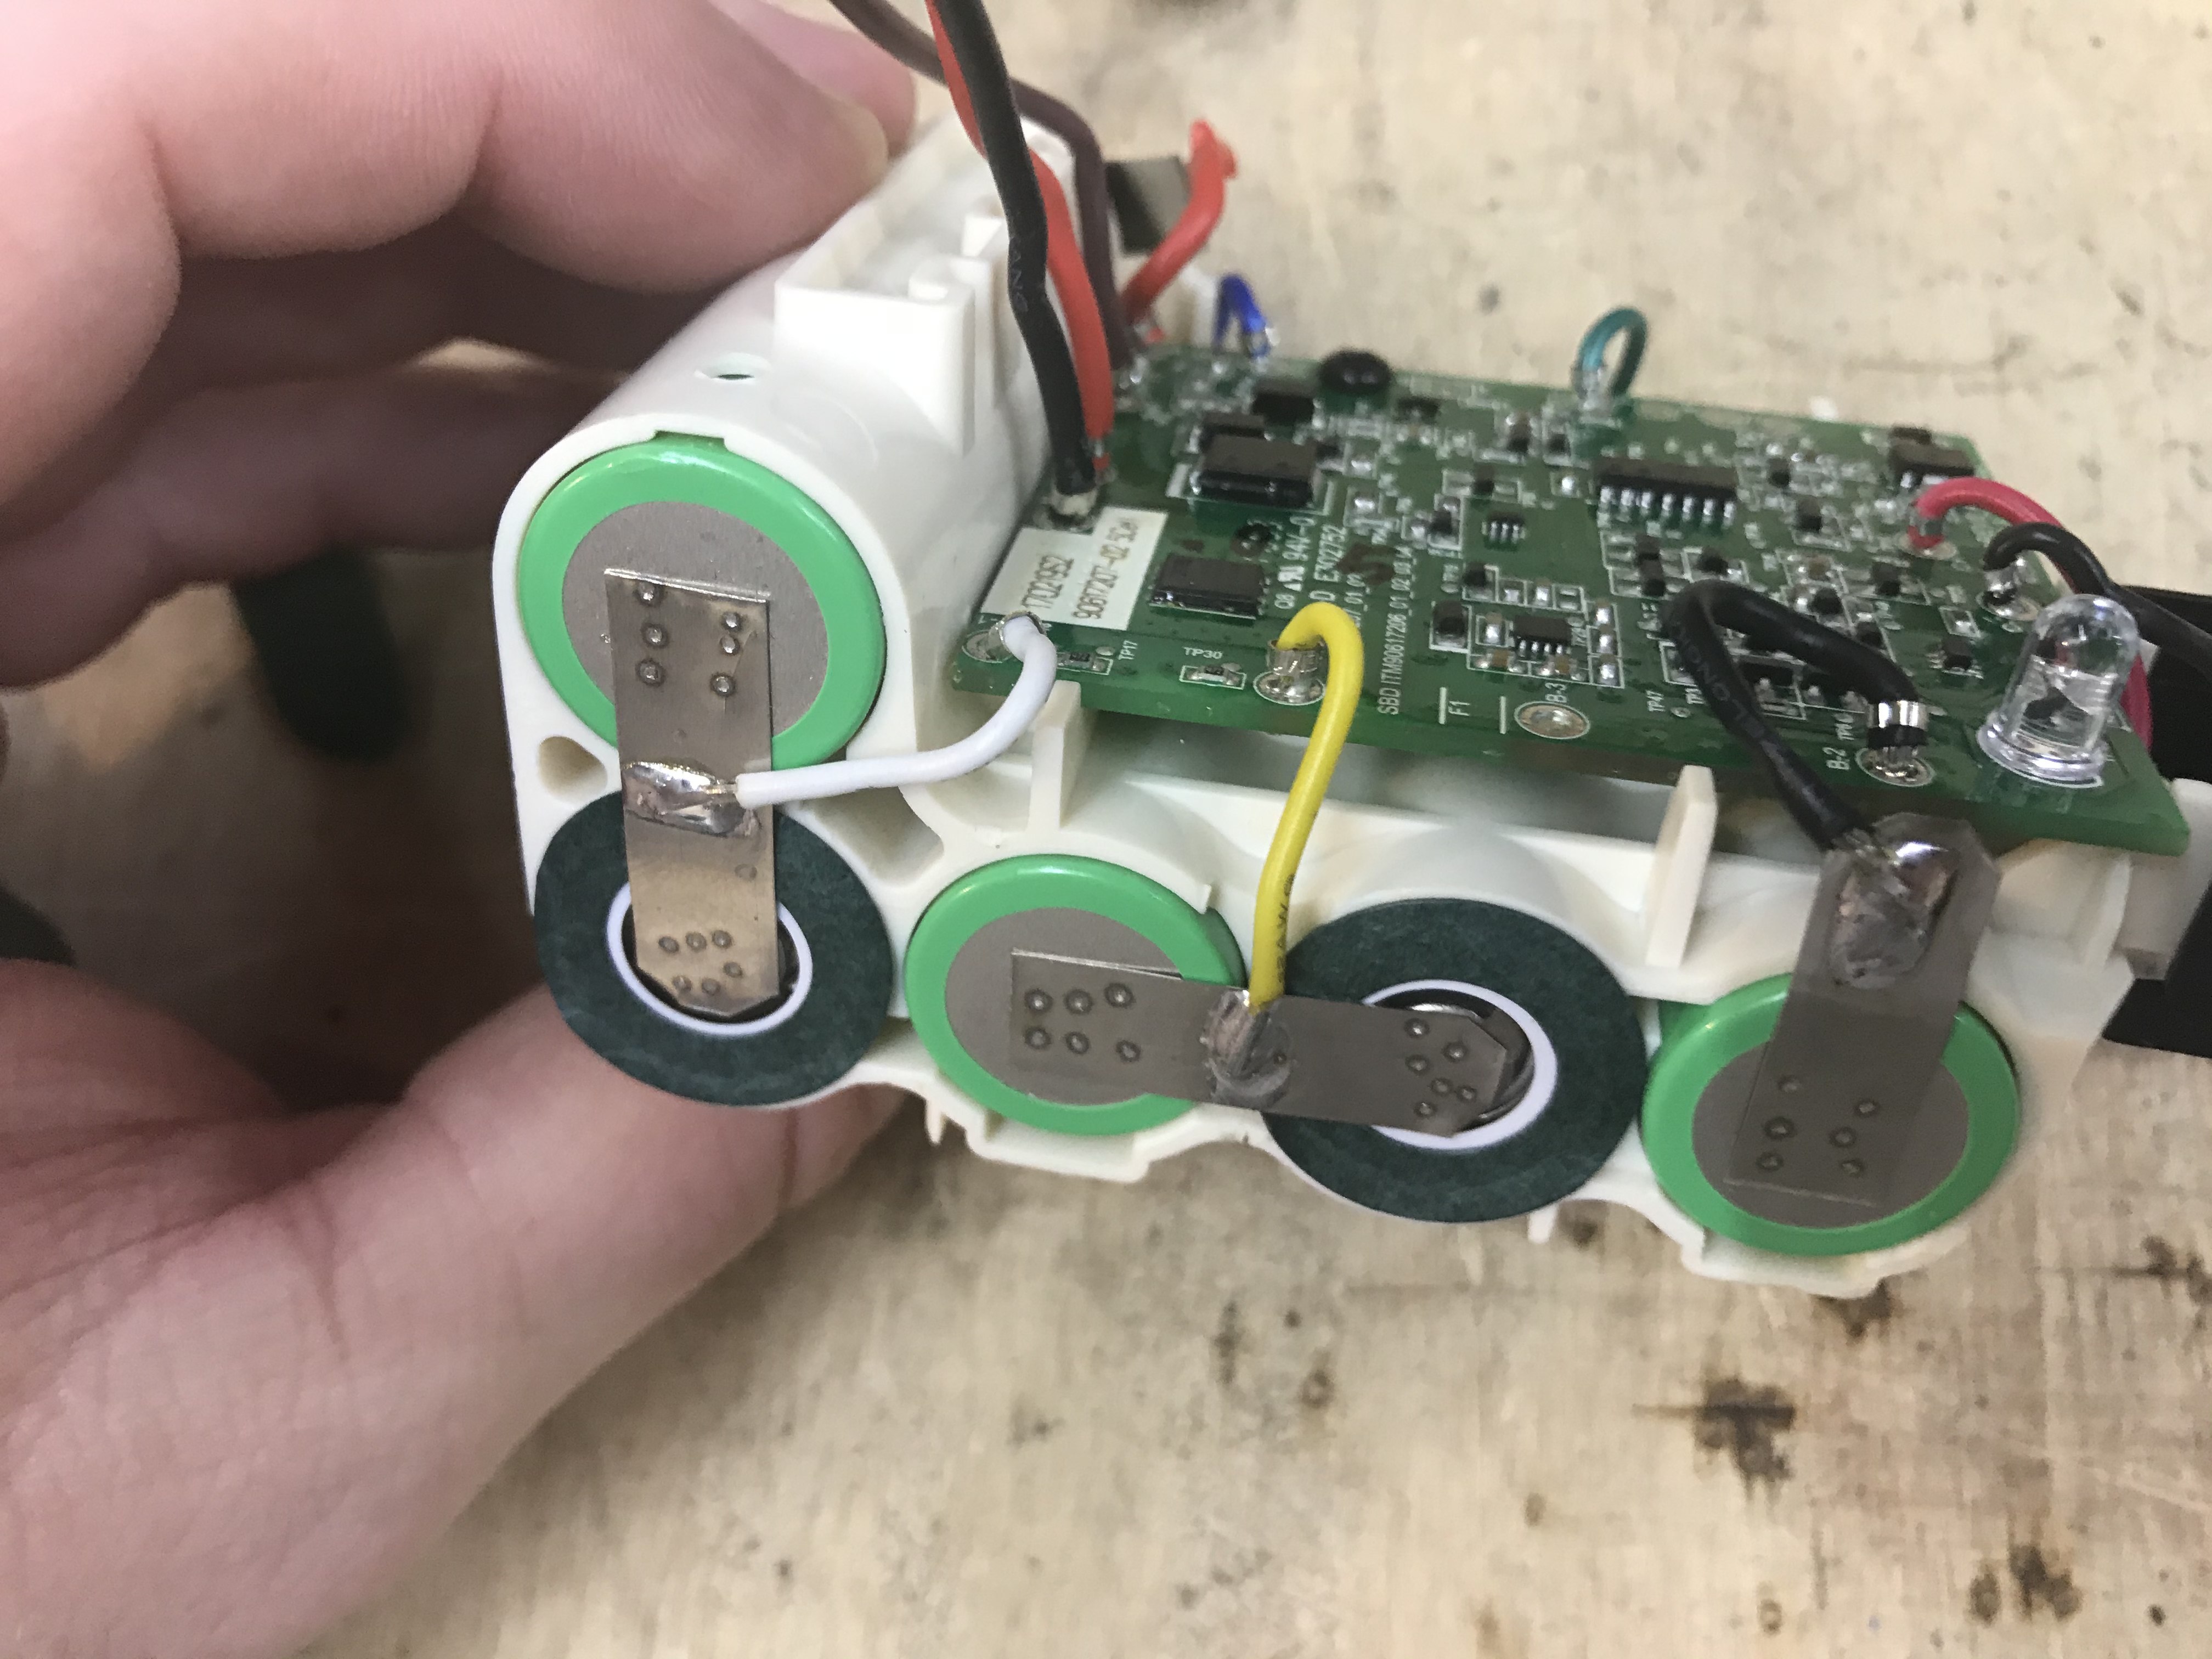
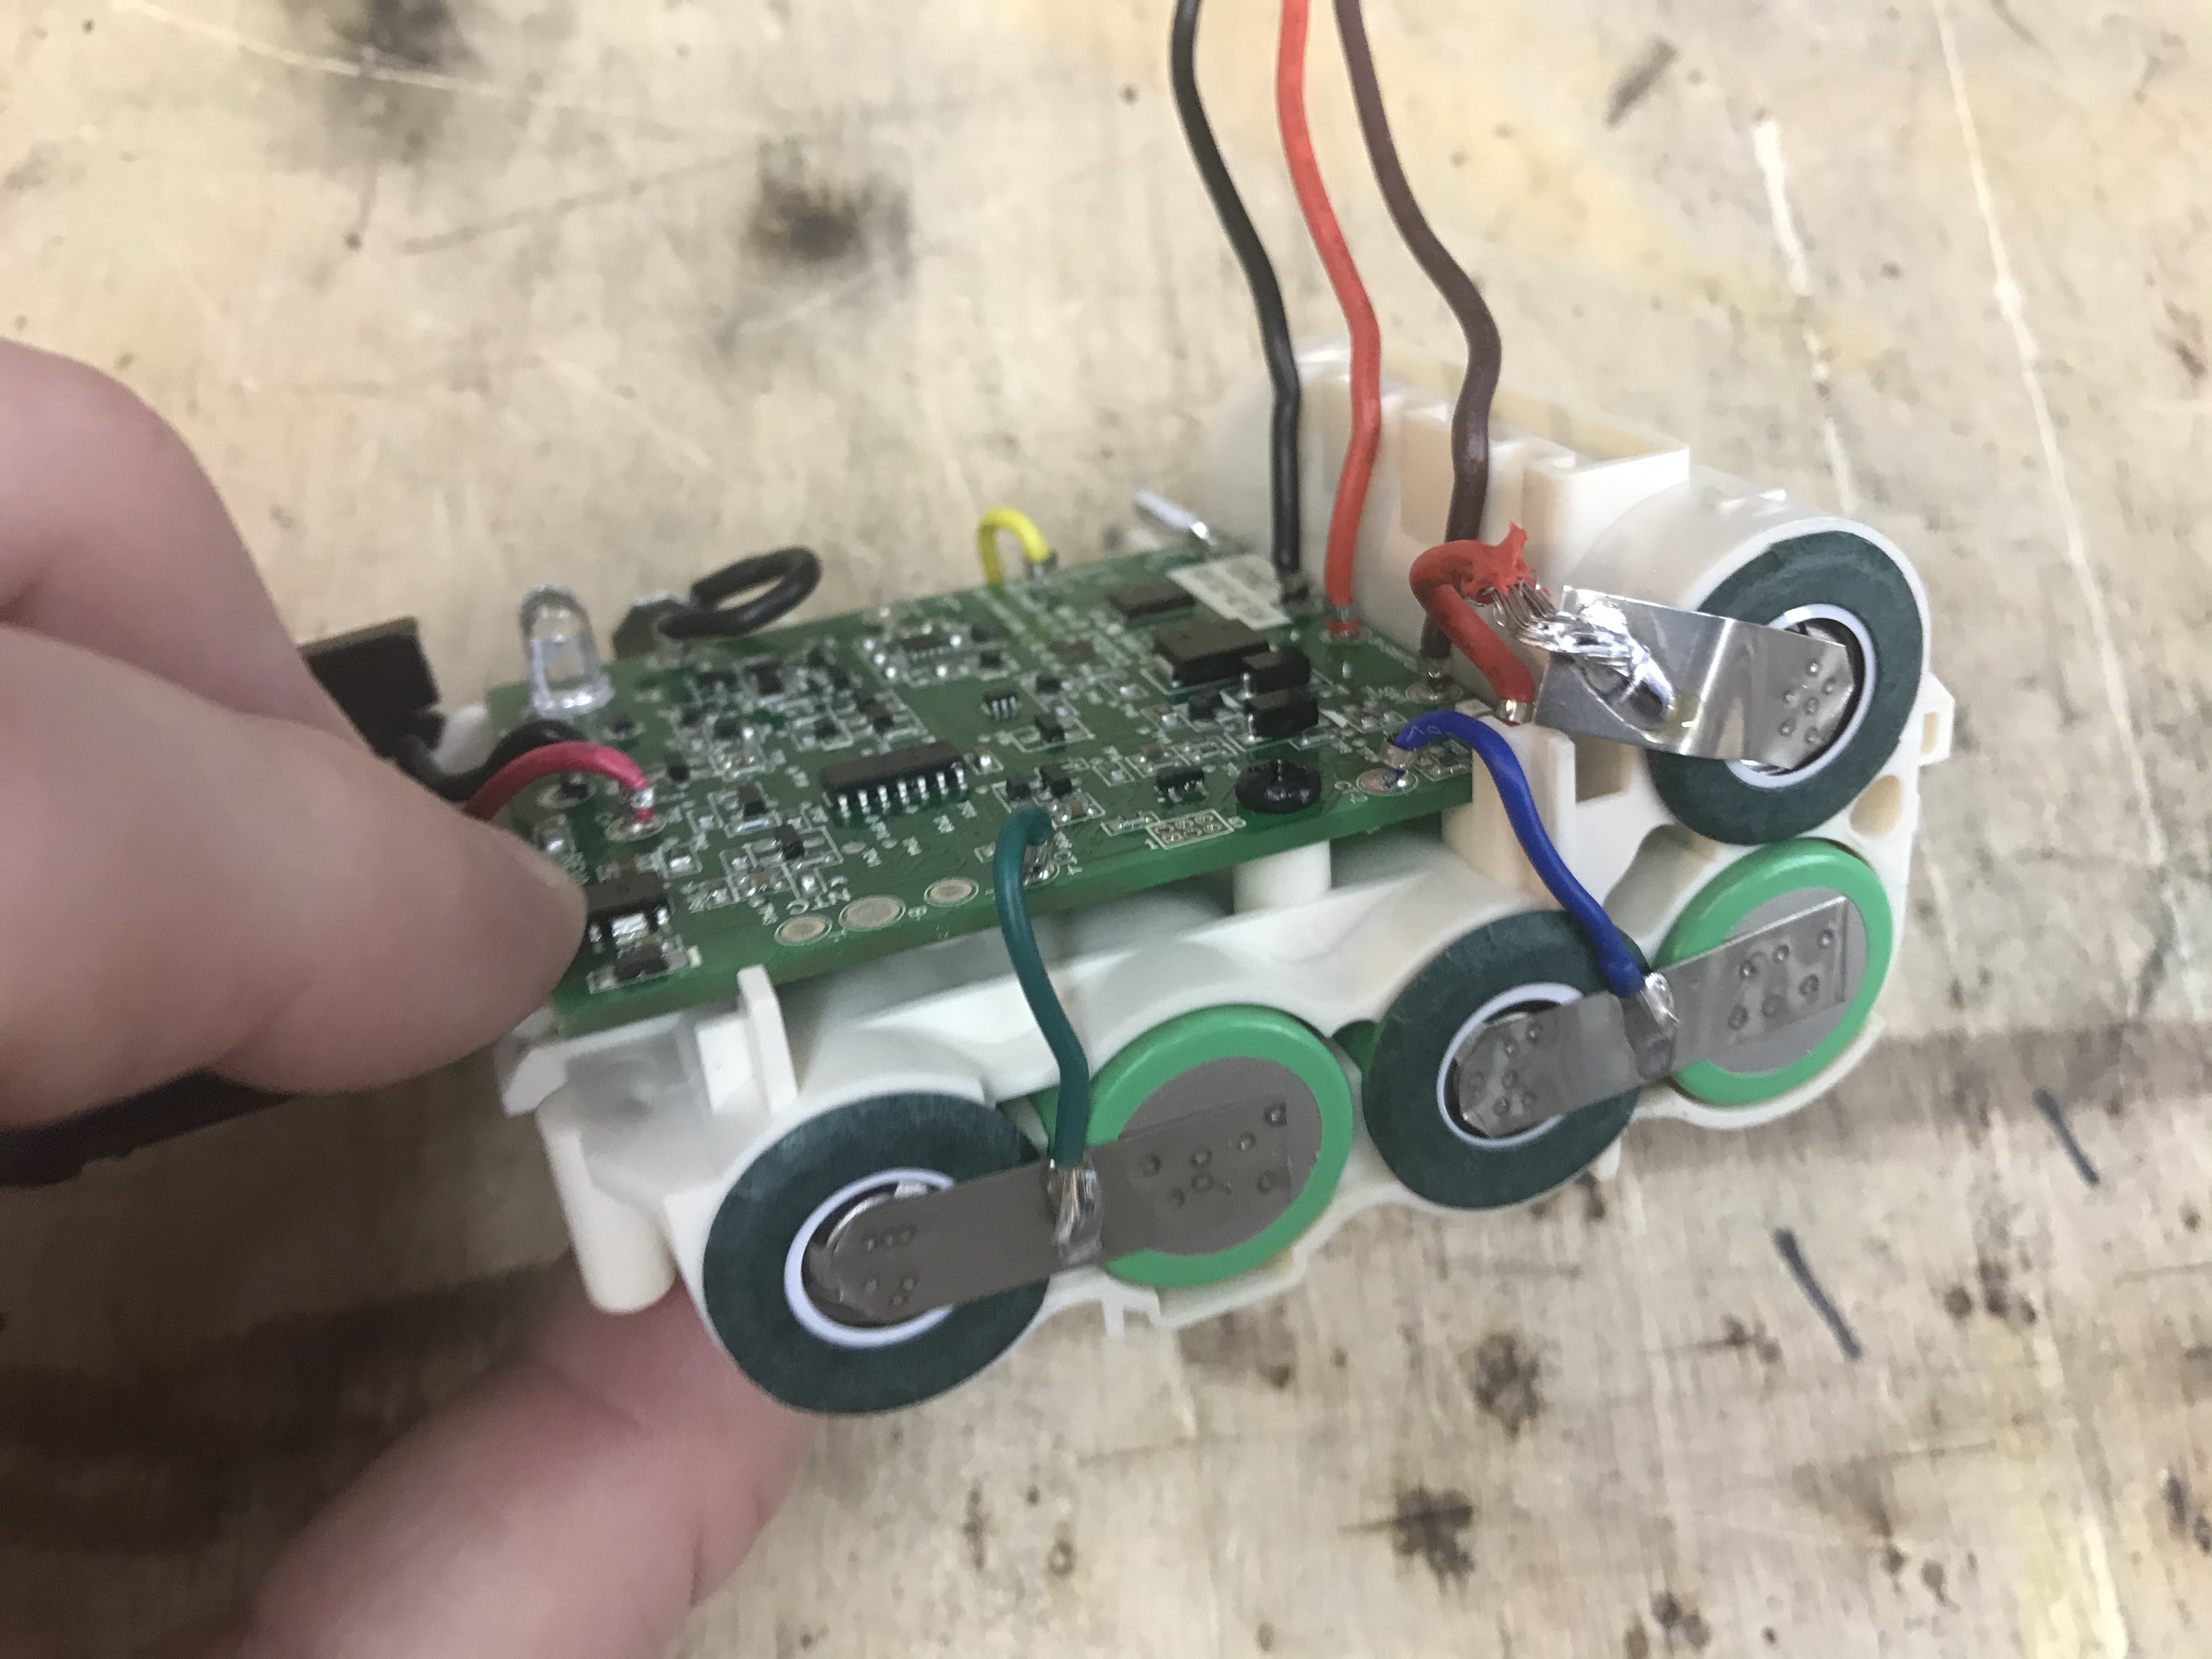
Once done, put a bit of solder onto the nickle strip between cells and and the neg+pos ends and start solder the balance/current wires back on. You should end up with something like this:
Finally, once you are done, it is time for the traditional “first charge on the concrete where a battery fire won’t spread.”

This should give the vacuum several more years of life and I can likely just do this again and again till the motor gives out – which is also probably even easier to replace.